
This afternoon I have a tutorial for you on how to decorate glass Christmas ornaments. The tutorial is from last year and it will show you step by step how to make your own. First I will share the ornaments I made this year. I've been making these for the past four years and when it gets this time of year I gather my supplies and start stamping. What is so much fun about giving these to people who don't know how they are made is they can't figure out how I got the stamped image inside the glass ornament. If you click on the tutorial below you will know how I made magic.

The snow flake I used is from the Festive Flurry stamp set in the Holiday Catalog. I stamped on Stampin' Up! Window Sheet and used White Embossing Powder and heated it with my Heat Tool. I used the lower heat and kept the heat tool about 4 inches from the window sheet.

This is the same stamp that I have been using for my Christmas cards. The set is called Joyful Christmas in the Holiday Catalog.
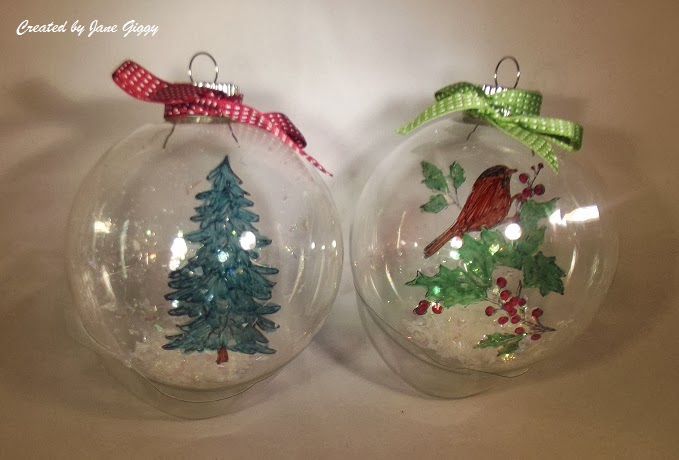
Did you notice the white snow like flakes on the bottom of the ornaments? That is Mica Flakes. These are retired from Stampin' Up! but I knew if I saved them I would have a use for them.

.JPG)
Color Me Christmas set is from the Holiday Catalog. I love this set. Each stamp is so cute. I have several little ones who will be getting a plastic ornament from me with one of these images.
The tutorial will list all the items you will need. I hope you will give this a try. Like so many projects I share...they are so much fun to make. They make nice gifts and are inexpensive to make.
Until next time...Happy Stampin' !
Jane
These are truly awesome! TFS!
ReplyDeleteThey are all so pretty, but I think the snowflake one is my favorite.
ReplyDeleteYour ornaments will look smashing in the tree!
ReplyDelete