Tuesday, October 29, 2013

Tuesdays Terrific Tips

It's Tuesdays Terrific Tips Today and I have a great tip I saw on Connie Stewart's blog last week. One of her downline came up with this and I think it is one of the best tips I've seen recentely.
I'm sure you have spent a lot of time on a card, making sure everything was in the right spot, the perfect color of card stock, ink and embellishments only to find when you were ready to send it to someone you turned it over and there was ink or fingerprints on the back! I have done this more than once and I could just cry when this happens. Like you I put a lot of myself into my cards and I want them to be as perfect as they can be. What a waste of time to have to start over or cut the front off and make adjustments.


If you follow this simple tip, no more dirty card backs.  It's so simple you will ask yourself, why didn't I think of this?

 Here they are...two different sizes of envelopes made from paper that you would usually throw away from your mail, or you can use computer paper. I really like using the junk mail idea because it is a cool way to recycle.

All you have to do is cut the 8 1/2" x 11" paper to 8 1/2" x 8 1/2" and using your Envelope Maker from Stampin' Up! lay the paper on the 3 3/4" mark for the first punch and draw a line to the edge of the paper. Do this on all four sides. Use the corner rounder that is on the Envelope Maker and fold your corners in. I used SNAIL to glue the sides.
I made two sizes. One for cards that fold on the left side and one for cards that fold on the top. Before you start working on your card, slip it in the paper envelope and you will never have a messed up card back again!  I love it!


This is so easy and simple...

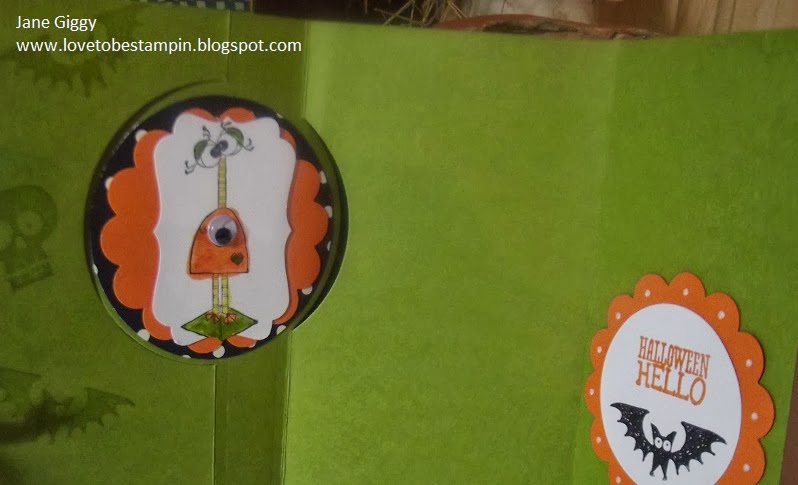
Next time I will give instructions how I made the quilt patterned card along with another tip on how to dress up pens when you give them along with journals or tablets.
Until next time...
Happy Stampin'
post signature


Monday, October 28, 2013

Marvelous Monday Halloween Printer Tray


It's Marvelous Monday again and I have a Halloween Printer Tray all decorated with Stampin'Up! goodies to show you!

Isn't it cute? I just love it! It so colorful and bright and when I look at it, I smile. This is the first Printers Tray I have decorated. I will be making one for Thanksgiving and Christmas this year and several of the holidays next year. Be sure to check back and see how I decorate these darling trays. I bought my trays at a local Craft Store. I liked this size and that it has eight sections to decorate. They do come in different sizes.

What's so nice about these trays you can decorate them as you please. They are easy to store.

Everything is Stampin' Up! but the spider, spider web and the jack-o-lantern. To the left of the spiders, I made a vase out of the Large Oval Punch and cut the top off to make it look like a vase. I made the roses with Stampin' Up! Simply Pressed Clay and used a Basic Black Stampin' Write Marker to color the flowers. Be sure to wear gloves.  The bats were made with the Large Butterfly Punch and cutting off the lower wings into a "V" shape. The ghosts are made with the Owl Builder Punch. I cut off the feet, turned it upside down and adhered Basic Black circles from the same punch.

To order Stampin' Up! Products from my online store click here

Hope you enjoyed today's post. Until next time...
Happy Stampin'!
Jane
post signature

Tuesday, October 22, 2013

Tuesdays Terrific Tips Stampin' Up! 25th Birthday...25% off 25 Stamp Sets


This week is Stampin' Up! 25th Birthday! We are having a Huge Stamp Sale. 25% off from 25 selected Stamp Sets Beginning today, October 22nd through October 28th. 
This message will be here at the top of my blog until the end of the day on October 28th. For additional posts, scroll down.

My Stampin' Up! online store is back online as of today. To order any of the 25 stamp sets or any of Stampin' Up! products just click here

Today is Tuesdays Terrific Tips
I have a tip that I just learned and I have been stamping for 20 years so I thought maybe some others may not know about it either.  Pass idea along to your fellow stampers.

Using the 1 3/4" Scallop Punch as Frame for the 1 1/4" Circle Punch
Today I am using the stamp set Very Merry Tags from the Holiday Catalog. I want to make a frame for my stamp
 (Very Merry). This is done when an opening of the same punch is already punched in a piece of card stock and the Stamped image is going to be on the inside of the card.
 The Very Merry stamp is at the top right of the photo.

 I stamped the Very Merry image on Whisper White card stock.
 I punched out a 1 1/4" Cherry Cobbler circle. This is the same size of the Very Merry Circle. I set the Cherry Cobber circle aside for another project.
 I punch around the 1 1/4" Cherry Cobbler opening  with the 
  1 3/4" Scalloped Circle Punch. Now I have a frame to use with the Very Merry Circle.


I attached the Cherry Cobbler Scallop Frame to the tag first and then added the Very Merry Circle and it fits right inside the Scallop Frame. I used last years designer Series Paper, Cherry Clobber ink, card stock and Seam Binding. The tag was made with Whisper White card stock and attached with Linen thread.  My tag and package are complete. This tip makes it much easier to punch out the right size of opening especially when the stamped image is on a small piece of card stock. I hope you found it helpful.
Remember my Stampin' Up! online store is back online.
Be sure to check out the Holiday Catalog which is on my store page along with the Big Catalog.
Just click here

Tomorrow is Wednesday Web Site Day along with another card or project.
Until then,
Happy Stampin'
Jane


Monday, October 21, 2013

Marvelous Monday Halloween Top Note Treat Basket

Beginning today, Mondays are going to be "Marvelous Mondays".
I will be featuring a special card, 3-D, Big Shot or Paper Project each week.
 I have an exciting announcement to make!! This is my 93rd posts from this blog! When I reach my 100th post I will be giving some Blog Candy away randomly but you have to leave a comment here on my blog once I post my 100th post. I will let you know when that happens. More details later.

This little Halloween Top Note Basket has been around a long time and I change it out each year on Halloween and Christmas. This would be a good project if you had a lot of treat holders or party favors to make.

So Cute!
This is a nice little treat basket to give older kids or adults.


It doesn't take long to make these darling little treat baskets.
What is so great about these is that they can be decorated to fit any occasion. Christmas, Birthday, Baby Showers, Bridal Showers,  the list goes on and on. Not only will it hold candy of all kinds, but tea lights, small lotions, or hand sanitizer. I'm sure you can think of more little goodies. They especially look nice on a table as party favors.

What you need to make this project:
Basic Black # 121045, Whisper White # 100730, card stock
Witches' Brew Designer Series paper #132185
Stazon Black Ink Pad #101406
Snail Adhesive #104332
Sampin' Dimensionals # 104430
1/8" Basic Black Taffeta Ribbon #119261
Tangerine Tango Stampin' Pad #126946
Daffodil Delight Stampin Write Marker # 119677
Stamp Set Halloween Hello wood # 131718, Clear # 131721
Large Oval Punch # 119855

Non Stampin' Up! Product
White #2 paper sacks 

Until Next Time...Happy Stampin!
Jane
post signature

Saturday, October 19, 2013

Witches's Brew Curly Halloween Wreath

More Halloween today. As I mentioned yesterday, I love making the curly paper wreath's. Today I have another Halloween wreath using the new Witches' Brew Designer Series Paper.
I used a 12" white Styrofoam wreath.. I only needed 6 sheets of double-sided designer Series paper. After cutting the 1/2" x 12" strips, I curled the paper with my bone folder just like you would curly ribbon.  I used about 150 straight pins for the wreath. After the paper is curled, poke the straight pin in the middle of the paper and poke into the wreath. I used my glue gun to adhere the bat to the ribbon. That's it!
Once the paper is the way you want it on the wreath, you can add ribbon for a hanger and an embellishment if you'd like.
I used the bat from the Halloween Banner Simply Created Accessory Kit at the bottom on top of my bow. The ribbon is retired but it looked so cute on my wreath.

  How cute and sparkly (is that a word) is the bat?
I added strips of 1/2" x 12" Champagne Glimmer paper to make the wreath pop! Love it!


What you need to make this wreath:
Halloween Banner Simply Created Accessory Kit # 132698
Witches' Brew Designer Series Paper #132185 
Champagne Glimmer Paper # 127885

Non  Stampin' Up! Products
White Styrofoam wreath
Straight pins 
Glue gun and glue stick
Hope you are having a great week end.
Until next time...Happy Stamin'!
Jane
post signature


Friday, October 18, 2013

Festive Flurry Gift Tags and Christmas Wreath

Happy Friday! It's sunny and 62 degrees here in Kalamazoo, Michigan. It has been cloudy the last couple of days so the sun is a welcome sight!

Today I have two sets of Festive Flurry gift tags and a Festive Flurry Christmas wreath. I made the tags and wreath a couple of week ago but I have been posting Halloween ideas this week. I thought I would mix it up today and show some Christmas ideas.

I have posted some Christmas cards using the Festive Flurry stamps set and Framelits Die and today I am featuring them again.
I love the stamps and the Framelits

 Sparkle, Sparkle, Sparkle!!


 Aren't these gorgeous? I love the sparkle of the Silver Glimmer paper, the Rhinestone Basics and the beautiful color of one of the new In Colors Coastal Cabana. I added Stampin' Up! 1/8" Silver Ribbon.  
And now the beautiful Raspberry Ripple tags.

Look at that Champagne Glimmer Paper shine! Love it!


I love these too. I can't decide which color I like the best. If you think they are beautiful here, you should see them in person!  I used Raspberry Ripple ink , Champagne Glimmer paper, Rhinestones Basic colored in Red Sharpie Marker and Cherry Cobbler Seam Binding.

I had to make myself stop making these tags, I could gone on all day but had to get moving on the Winter Frost Curly Paper wreath.  I'm in love with this Designer Series Paper and here again, I could stamp and create with this card stock, designer series paper and ink all day.


I think this Winter Frost Specialty Designer Series Paper is so yummy! I would never have thought of using these colors for Christmas but they work beautifully!

Products used for the gift tags:
Whisper White card stock
Chalk Talk Framelit Die
 Coastal Cabana Ink
Raspberry Ripple Ink
Cherry Cobbler Seam Binding
3/4" Island Indigo Chevron Ribbon for the hanger
Sliver Glimmer Paper
Champagne Gllimmer Paper
Silver 1/8" Ribbon
Rhinestone Basics
Big Shot Die Cutting Machine

Products used for the Wreath:
6 sheets of Winter Frost Designer Series Paper
Bone Folder...to curl the paper
Sliver Glimmer paper
Festive Flurry stamp set 
Festive Flurry Framelits Die
Coastal Cabana Ink
Typeset Alphabet Bigz Die 
Big Shot Die Cutting Machine


Non Stampin' Up! Products:
Straight Pins 
12 " White Styrofoam Wreath
Glue Gun and Adhesive

Tomorrow, I am playing all day with my Stampin' Up! toys...
I have a lot more ideas to show you and hopefully and encourage you to make some of your own Christmas cards and gifts this season.
Just a reminder I don't have a Stampin' Up! store but you can still order Stampin' up! products from me. Send me an email and let me know what you want to order and I will send you an invoice.
Have a great week-end! Until next time...
Happy Stampin!

Jane
post signature
Add caption

Tuesday, October 15, 2013

Ceramic Pine Tree Costers

Today I have turned ceramic tiles into ceramic coasters. There are several ways to decorate tiles, but I wanted to see if embossing them and then sealing them with water based clear finish would keep them in mint condition.
Notice that the background of the coaster is dull. This is the way you want the tiles.....no glaze.
These photos were taken before I sealed them. You can see the tree looks shinny; that's the embossing. I really like the way they turned out. On the back I Used Crystal Effects to glue the cork so they will not to scratch the furniture.
It turns out that embossing the tiles and then adding a sealant works well. I used Minwax  Polycrylic Protective Clear Stain   and applied two coats with a foam brush that I could throw away. I let the coaster dry a half hour in between coats. Another great feature with the Minwax Finish is that it cleans up with water.

What you need to make this project:

Stone Ceramic Tiles that aren't glazed 
 I bought my tiles at Lowe's
Sheet of cork for the back of the coasters
Crystal Effects to glue the cork on the coasters.
Stamp (I used a retired set) and VersaMark Ink
Embossing Powder of your choice of color
Polycrylic Protective Finish of your choice
Heat Tool
Foam brush
Covered surface to protect your work space.

Until next time...Happy Stampin!
Jane
post signature
 

Simply Pressed Clay Halloween Cuties

I woke up about 3:00 a.m. with an idea to make something for Halloween out of Stampin' Up! Simply Pressed Clay. So did I go back to sleep like a normal non- crafter? NO  I gathered my supplies and headed for my recliner in the living room.

This is what I finally made and I love them! They are such little Halloween cuties! 

 I know they aren't to scale but they still look cute together.

I used Simply Pressed Clay # 130685
Tangerine Tango #11841, Old Olive #100531, Basic Black #102512  and Pumpkin Pie # 105229 Ink Refills
Owl Builder Punch # 118074, Itty Bitty Shapes Circle # 118309
Basic Black card stock # 121045
Paper Snips # 103579
Non Stampin' Up! Products:
Plastic Gloves
Toothpicks for the lines on the pumpkins and the pupils on the spiders eyes. 
Paper plate and paper bowl.


I started by using a ball of the clay and adding a couple drops of Ink Refill at a time and working it in. When I had the shade I wanted I started to form my shapes. I found that for the spider it was better to form the eyes and legs and let them sit for about 15 minuets before attaching them to the spiders body. For the stems on the pumpkins I cut one end off after I put them on the pumpkin so it would look like the pumpkins had been cut off the vine. The Ghost I formed free hand and added the Basic Black circle punches after it set for about 6 hours.

This is how the clay looks after taking it out of the pouch. It is very easy to use and mold. I had no trouble forming circles, snakes or round balls. Be sure to only take out the clay you are going to use. Reseal the pouch so the remaining clay won't dry out. I really enjoyed this project....can you tell? :-)

I don't have a Stampin'Up! store but anytime you want to order the above products or other products, email me and I will send you an invoice. Thanks for stopping by.
Until Next Time....Happy Stampin!
Jane

post signature

Monday, October 14, 2013

Monstermaniacs Halloween Card Share

As soon as I saw this cute stamp set I thought of Halloween. I love the little characters. They aren't scary at all. I used two of the images in my card.  Order number #134972 Five Piece Stamp Set.

Aren't they just too cute!


Designer Series Paper: Modern Medley
Card Stock: Pumpkin Pie, Whisper White, Basic Black, Old Olive
Punches: 2 1/2" Circle, 2 3/8" Scallop Circle, 1 1/4" Circle, and  Label Bracket Punch
Ink: Stazon Black and VersaMark Ink
Markers: Pumpkin Pie, Old Olive, and Daffodil Delight
Big Shot: Circle Framelit Die
Adhesive: Stampin Dimensionals, Snail Adhesive and Multipurpose Liquid Glue
White Stampin' Up! Chalk Marker 
Stamp Sets: Halloween Hello, Tags 4 You, and Monstermaniacs

Until next time, Happy Stampin!
Jane
post signature